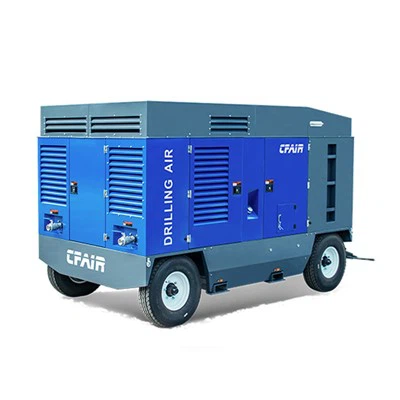
Connecting a tool to a portable air compressor is a task that combines practical knowledge with a bit of technical know - how. As a supplier of portable air compressors, I've witnessed the importance of this process for countless customers. Whether you're a DIY enthusiast working on a home project or a professional tradesperson on a job site, knowing how to connect your tools properly to the compressor is crucial for optimal performance.
Understanding Your Portable Air Compressor
Before you start connecting any tools, it's essential to understand the key components of your portable air compressor. Portable air compressors come in various types, such as Compressor Portable, Mobile Air Compressor, and Engine Drive Air Compressor. Each type has its own unique features and capabilities.
The main parts of a portable air compressor include the air tank, the pump, the motor, and the regulator. The air tank stores compressed air, which is then used to power your tools. The pump is responsible for compressing the air and filling the tank. The motor drives the pump, and the regulator allows you to control the pressure of the air being released from the tank.
Tools Required for Connection
To connect a tool to your portable air compressor, you'll need a few basic tools. These include an air hose, a coupler, and a plug. The air hose is the conduit through which the compressed air travels from the compressor to the tool. It's important to choose an air hose that is the appropriate length and diameter for your specific application. A longer hose may be needed for larger job sites, but keep in mind that a longer hose can also result in a drop in pressure.
The coupler and plug are used to connect the air hose to the compressor and the tool. There are different types of couplers and plugs available, so make sure you choose ones that are compatible with your compressor and tool. Most modern compressors and tools use a standard quick - connect system, which makes it easy to attach and detach the air hose.


Step - by - Step Connection Process
- Prepare the Compressor: First, make sure your portable air compressor is turned off and unplugged (if it's an electric model). Check the oil level (if it's an oil - lubricated compressor) and the air filter. Ensure that the air tank is empty or at a low pressure.
- Attach the Air Hose to the Compressor: Locate the air outlet on the compressor. This is usually a threaded port. Take the coupler end of the air hose and screw it onto the air outlet. Make sure it's tightened securely to prevent air leaks.
- Connect the Plug to the Tool: Find the air inlet on your tool. Attach the plug end of the air hose to the tool's air inlet. If your tool uses a quick - connect system, simply push the plug into the coupler on the tool until you hear a click, indicating a secure connection.
- Adjust the Pressure: Once the air hose is connected to the compressor and the tool, turn on the compressor. Allow it to build up pressure in the tank. Use the regulator on the compressor to adjust the pressure to the level required by your tool. You can find the recommended pressure for your tool in its user manual.
- Test the Connection: Before using the tool, perform a quick test. Squeeze the trigger on the tool to release a small amount of air. Check for any air leaks around the connections. If you notice any leaks, tighten the connections further or replace any faulty parts.
Common Issues and Troubleshooting
- Air Leaks: Air leaks can occur at the connections between the air hose, the compressor, and the tool. To fix this, check the tightness of the connections. If the leak persists, inspect the couplers and plugs for damage. You may need to replace them.
- Low Pressure: If your tool is not performing as expected and you suspect low pressure, first check the regulator on the compressor. Make sure it's set to the correct pressure. Also, check the air filter on the compressor to ensure it's clean. A clogged air filter can restrict airflow and reduce pressure.
- Tool Not Working: If the tool doesn't work at all, check the power source (if it's an electrically - powered tool in addition to being air - powered). Also, make sure the air hose is not kinked or blocked.
Safety Precautions
- Wear Protective Gear: When working with a portable air compressor and tools, always wear safety glasses, ear protection, and appropriate clothing. Compressed air can cause serious eye injuries, and the noise from the compressor and tools can damage your hearing.
- Follow Manufacturer's Instructions: Read and follow the user manuals for both the compressor and the tool. This will help you use them safely and correctly.
- Proper Ventilation: Make sure the area where you're using the compressor is well - ventilated. Compressors can produce heat and exhaust fumes (if it's a gas - powered model), which can be harmful if inhaled in a confined space.
Conclusion
Connecting a tool to a portable air compressor is a relatively straightforward process, but it requires attention to detail and a basic understanding of the equipment. By following the steps outlined above and taking the necessary safety precautions, you can ensure a successful connection and optimal performance of your tools.
If you're in the market for a high - quality portable air compressor or have any questions about connecting tools to your compressor, we're here to help. Our team of experts can provide you with the guidance and support you need. Whether you're looking for a Compressor Portable, a Mobile Air Compressor, or an Engine Drive Air Compressor, we have a wide range of products to meet your needs. Contact us today to start a discussion about your procurement requirements.
References
- Compressor Handbook, 3rd Edition
- Tool Manufacturer's User Manuals